DIY of the Week: Paper Pumpkins
Here’s another fall DIY courtesy of DIYInspired that you can make to decorate your home. They work for Halloween but can also be displayed into November. Let us know if you’d be interested in trying this out!

Materials:
- Colored or patterned paper of choice
- Paper Cutter
- Double Sided Tape
- Hot Glue and Glue Gun
- Sticks
- Twine
- Scissors
Instructions:
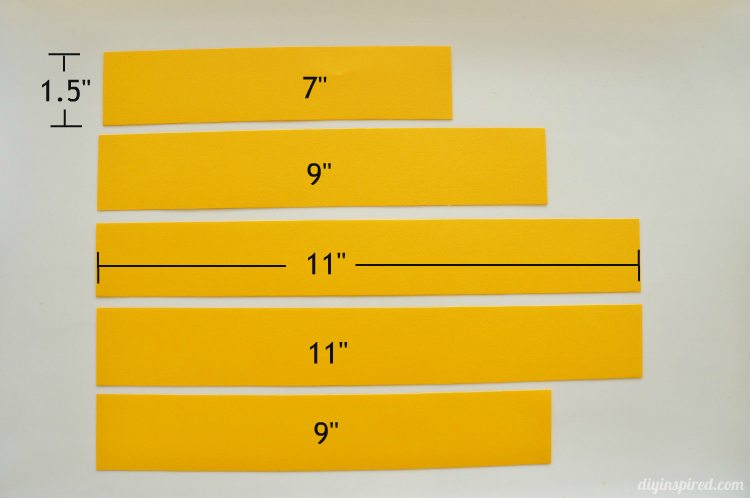
- Cut each piece of paper vertically into five 1.5” wide strips.
- Then cut each strip into one 7”, two 9”, and keep the remaining two at 11”. Remember, you need two sets for one pumpkin. So each pumpkin is two pieces of paper – two 7”, four 9”, and four 11” strips.
3. Next tape the two sets and same lengths together with double sided tape and form a circle. You will end up with one circle from the 7” strips, two circles from the 9” strips, and two circles from the 11” strips.
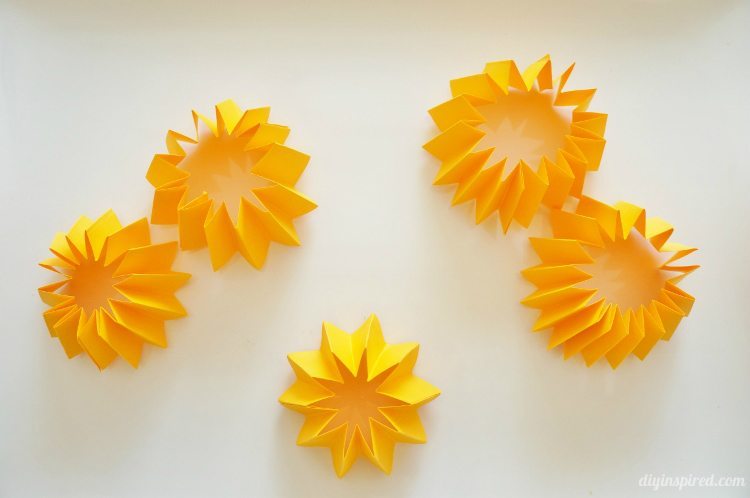
4. Create the 7” medallion by gluing with a hot glue gun. Just place a small dab in the center and hold a few seconds until it is dry.
5. Next, glue each medallion together respectively starting with the 7” on top, then 9”, then 11”, then 11”, then 9” on the bottom.
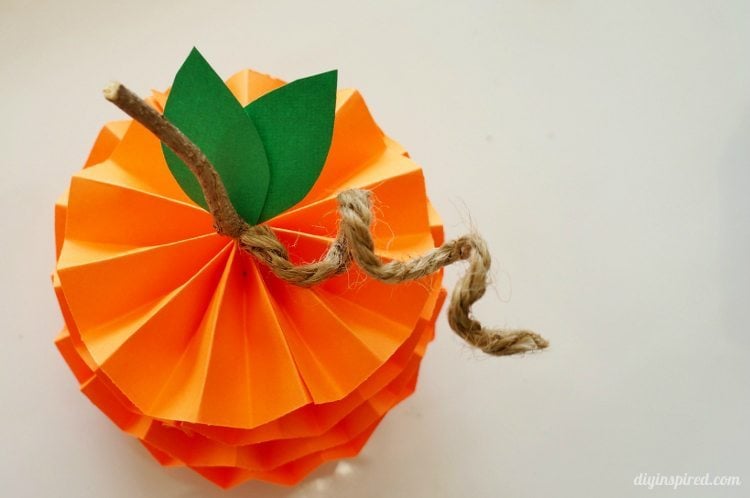
6. Hot glue a stick, paper leaves, and twine on the top of your pumpkin.